11: Computer Programming
Assignment
Document progress on a final project.
Fixing the Valve Leak

Rob and Nathan were merciful on us and allowed us to work on our final projects instead of giving us an additional computer programming assignment on top of our final project.
One of the problems I ran into when testing my elbow configuration was that the solenoid valve I used was not strong enough to withhold all of the air pressure coming from the tank. As a result, a little bit of air leaked through when no buttons were pressed, causing the arm to slowly rise without a given command to rise.
To fix this, I will have a “master solenoid valve,” on top of the solenoid valves for each joint of the robot, and I will create an Arduino program that will only open the master valve when one of the joint valves is opened (i.e. when I want the robot to move). I tested two solenoid valves in series, and found that two of them are sufficient at withholding the air pressure from the tank.
The program is as follows:
// The purpose of this program is to activate valve 5
// when any combination of the first four valves are activated

// unchanging constants
const int valveOne = 2;
const int valveTwo = 3;
const int valveThree = 4;
const int valveFour = 5;
const int valveFive = 6;

// variables
int valveOneState = 0;
int valveTwoState = 0;
int valveThreeState = 0;
int valveFourState = 0;

void setup() {

  // initialize valves 1-4 as inputs:
  pinMode(valveOne, INPUT);
  pinMode(valveTwo, INPUT);
  pinMode(valveThree, INPUT);
  pinMode(valveFour, INPUT);

  // initialize valve 5 as an output:
  pinMode(valveFive, OUTPUT);

}

void loop() {

  // find the state of valves 1-4:
  valveOneState = digitalRead(valveOne);
  valveTwoState = digitalRead(valveTwo);
  valveThreeState = digitalRead(valveThree);
  valveFourState = digitalRead(valveFour);

  // check to see which button is pressed. If both pressed, give warning signal
  if (valveOneState == LOW && valveTwoState == LOW && valveThreeState == LOW && valveFourState == LOW) {

    digitalWrite(valveFive, LOW);

  } else { // if ANY of valves 1-4 are activated, activate valve 5

    digitalWrite(valveFive, HIGH);

  }

}
Image from here.
Machining some Robot Parts
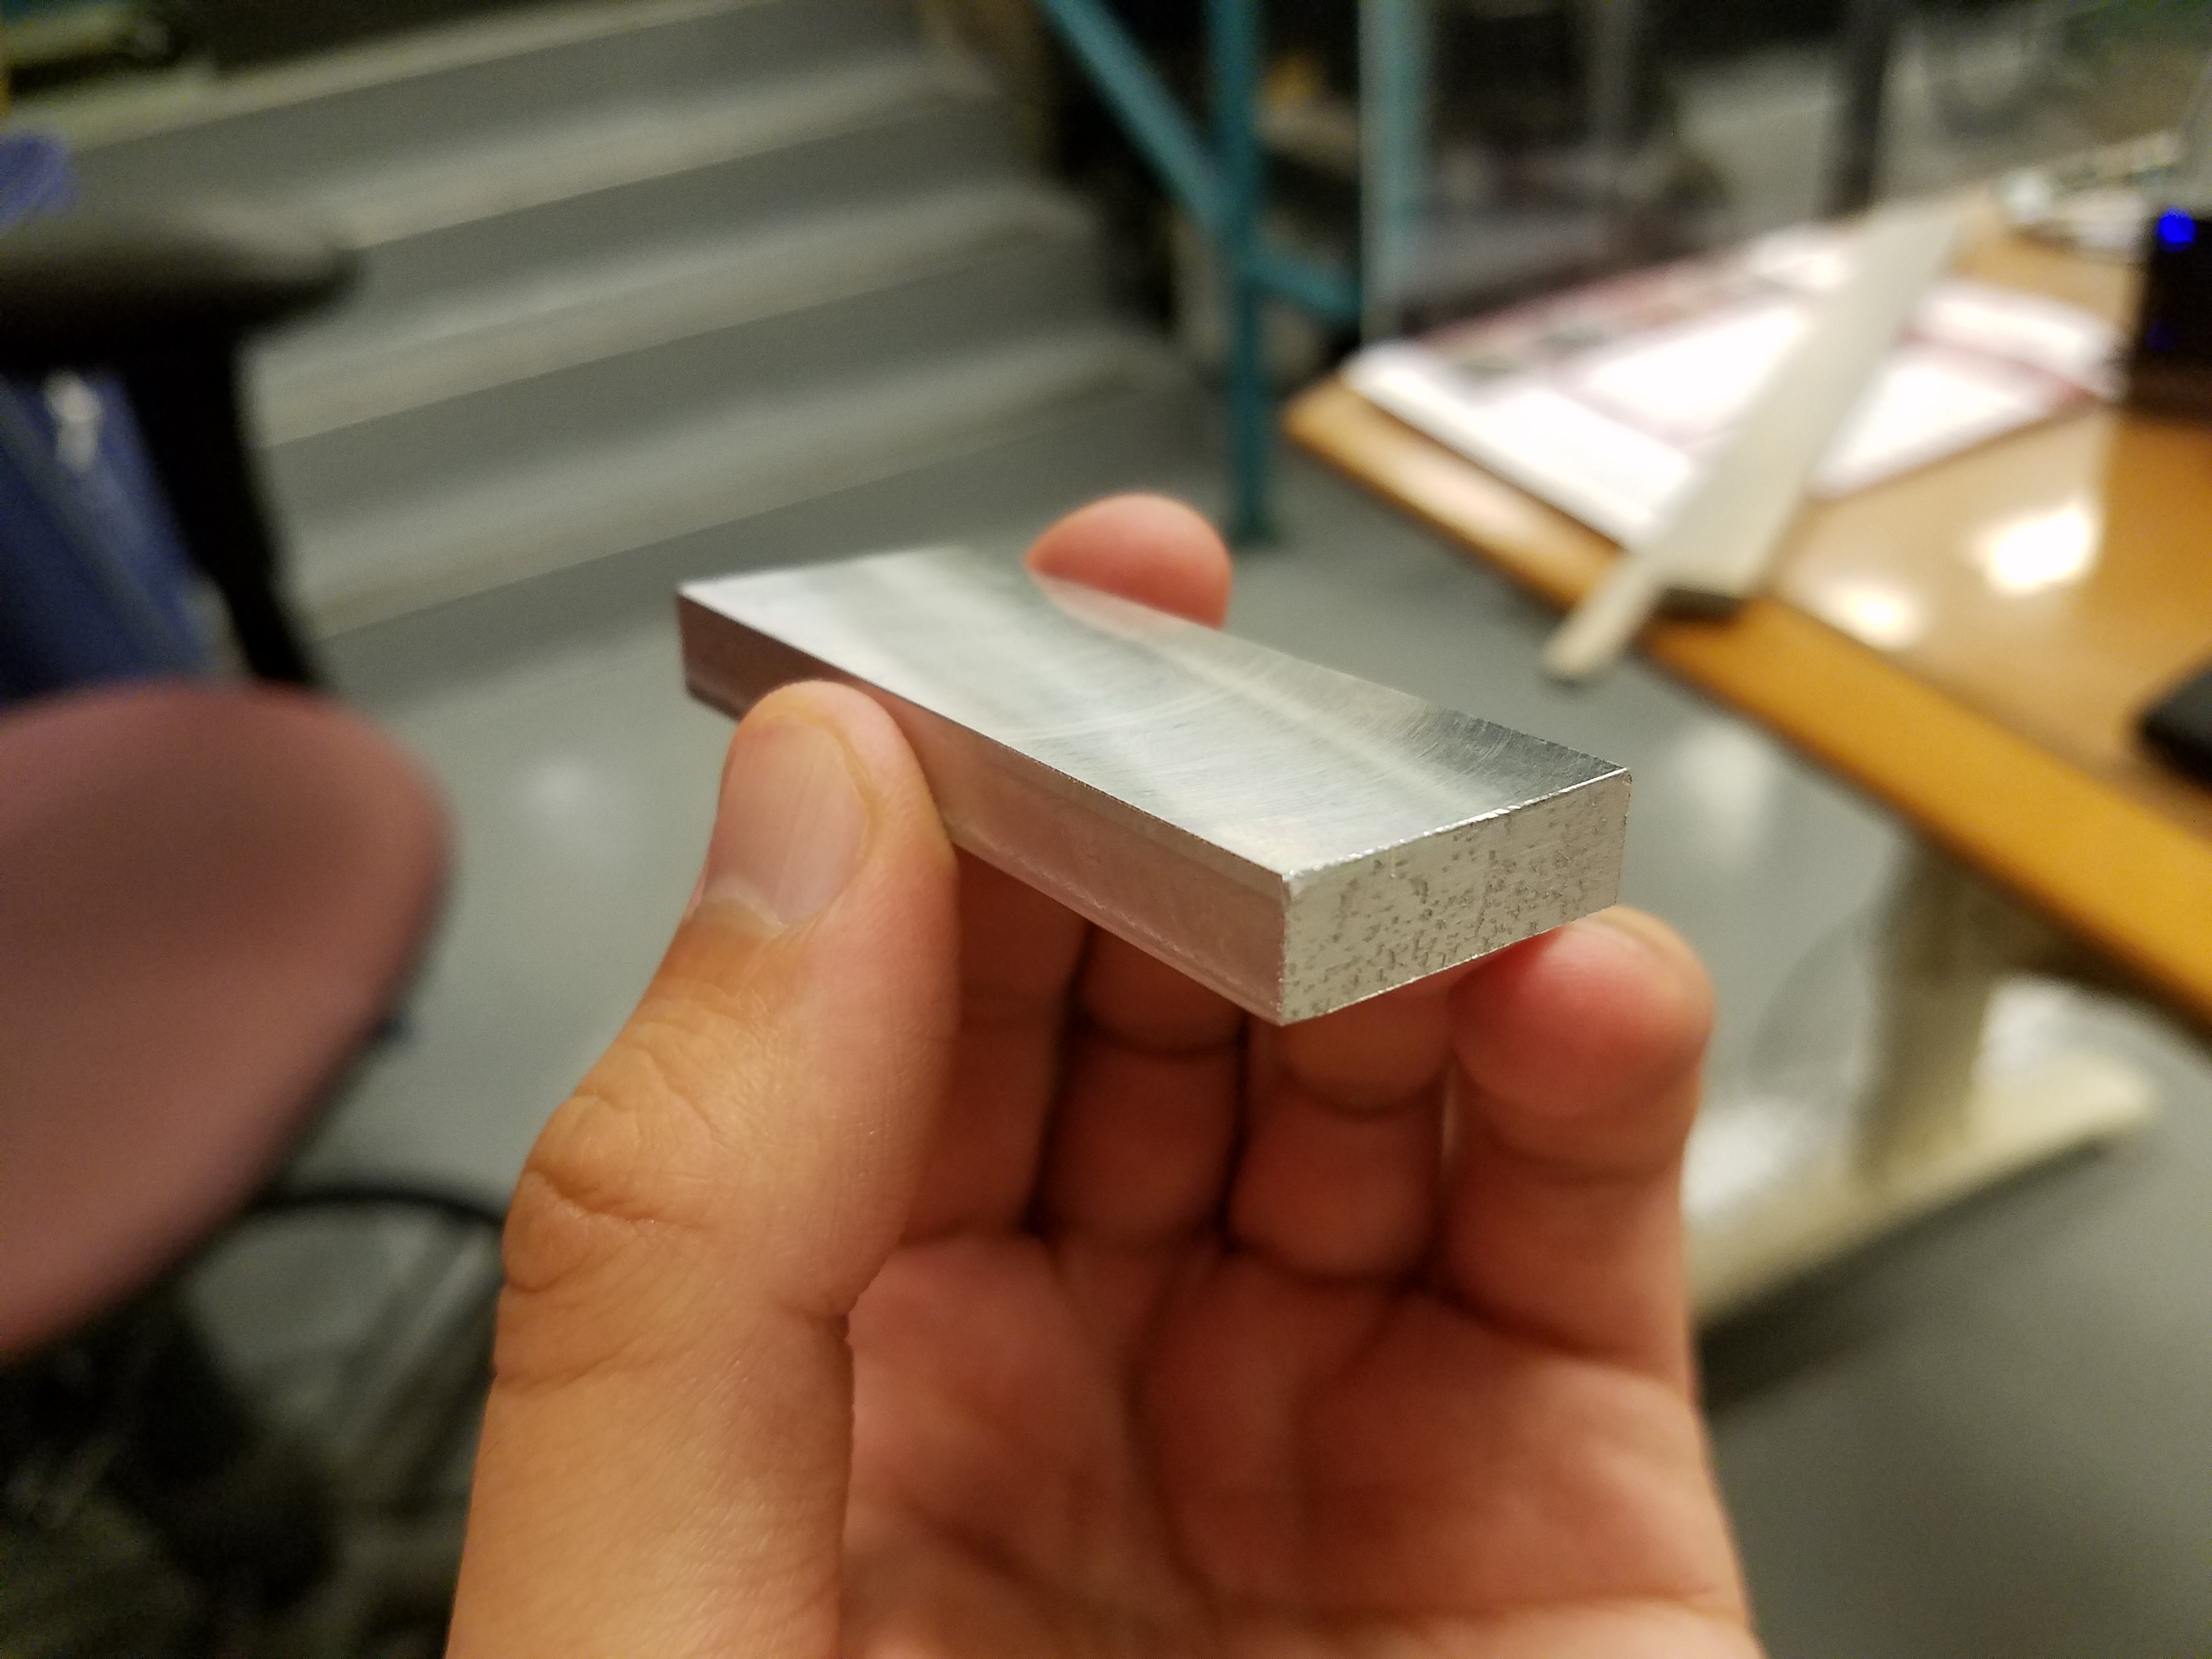
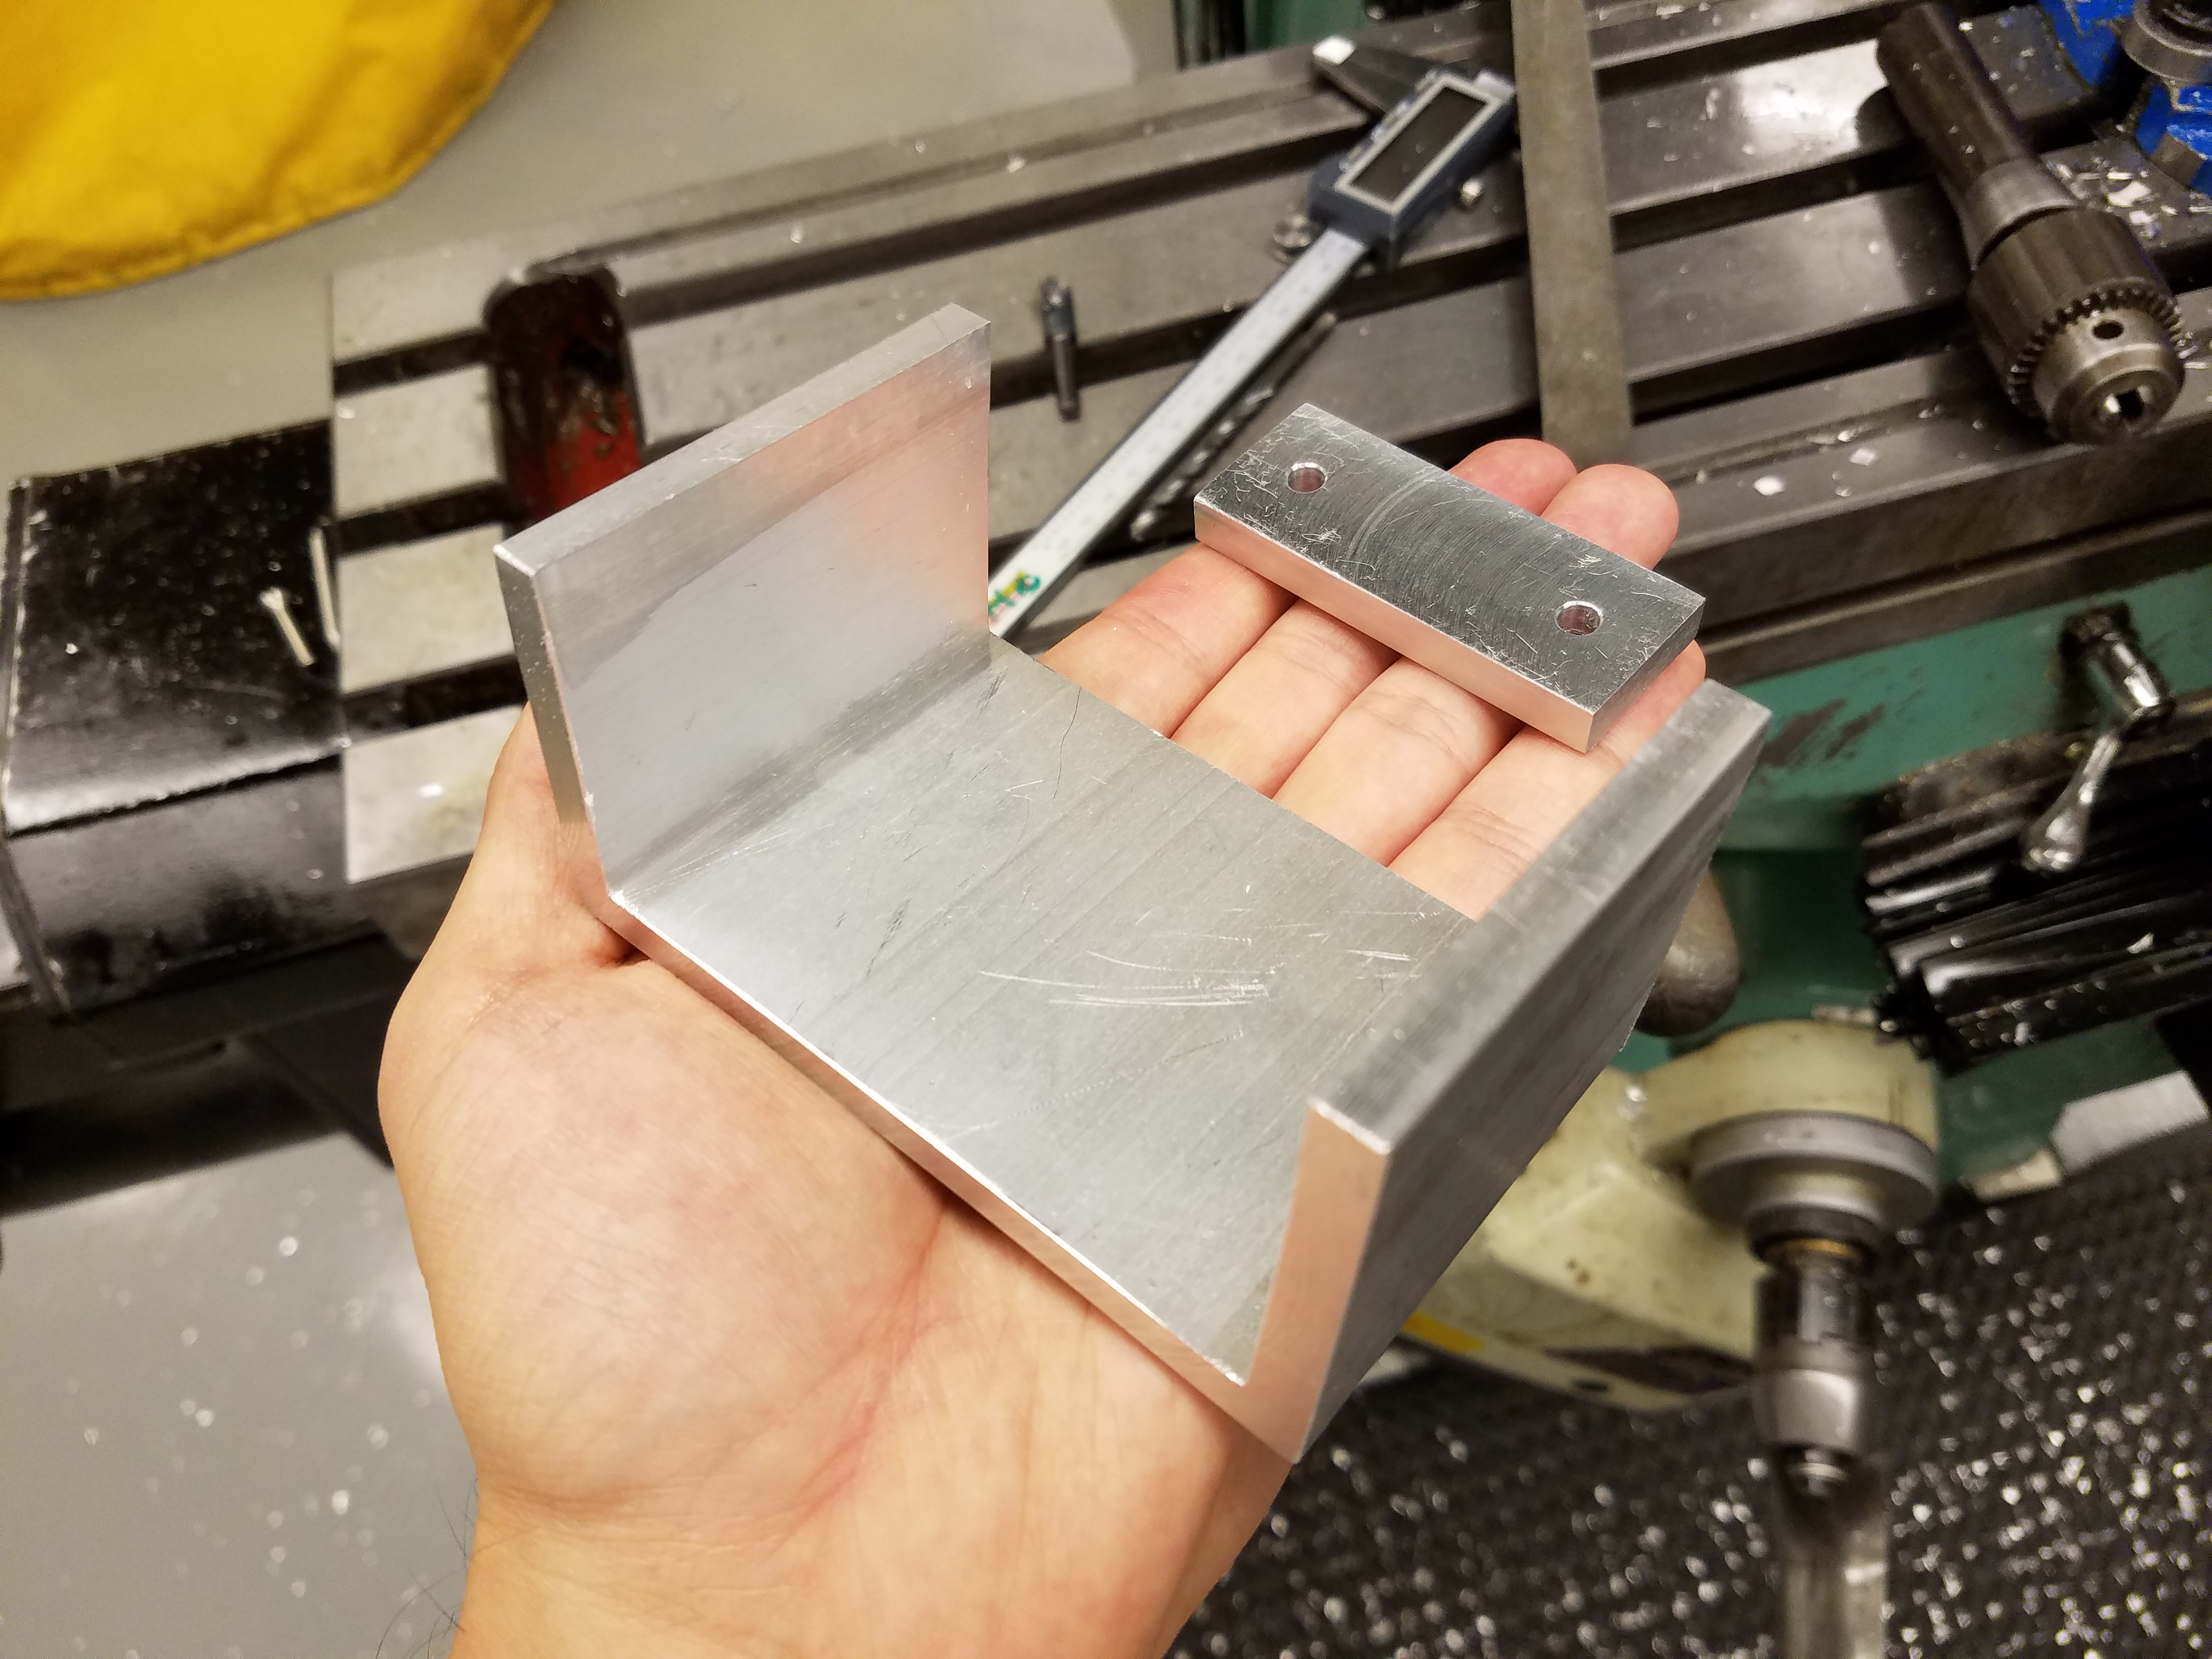
Instead of 3D printing the clamping parts I needed in session 6, I decided to machine them myself at the SEAS Instructional Machine Shop. The first step to machining parts is to determine the dimensions of your pieces, and then finding and cutting the necessary material. I decided to use aluminum, fitting with the rest of my robot.
After cutting a rough aluminum bar, I used the grinder to deburr the object. I then precisely machined it using a milling machine to get this nice-looking finished bar:
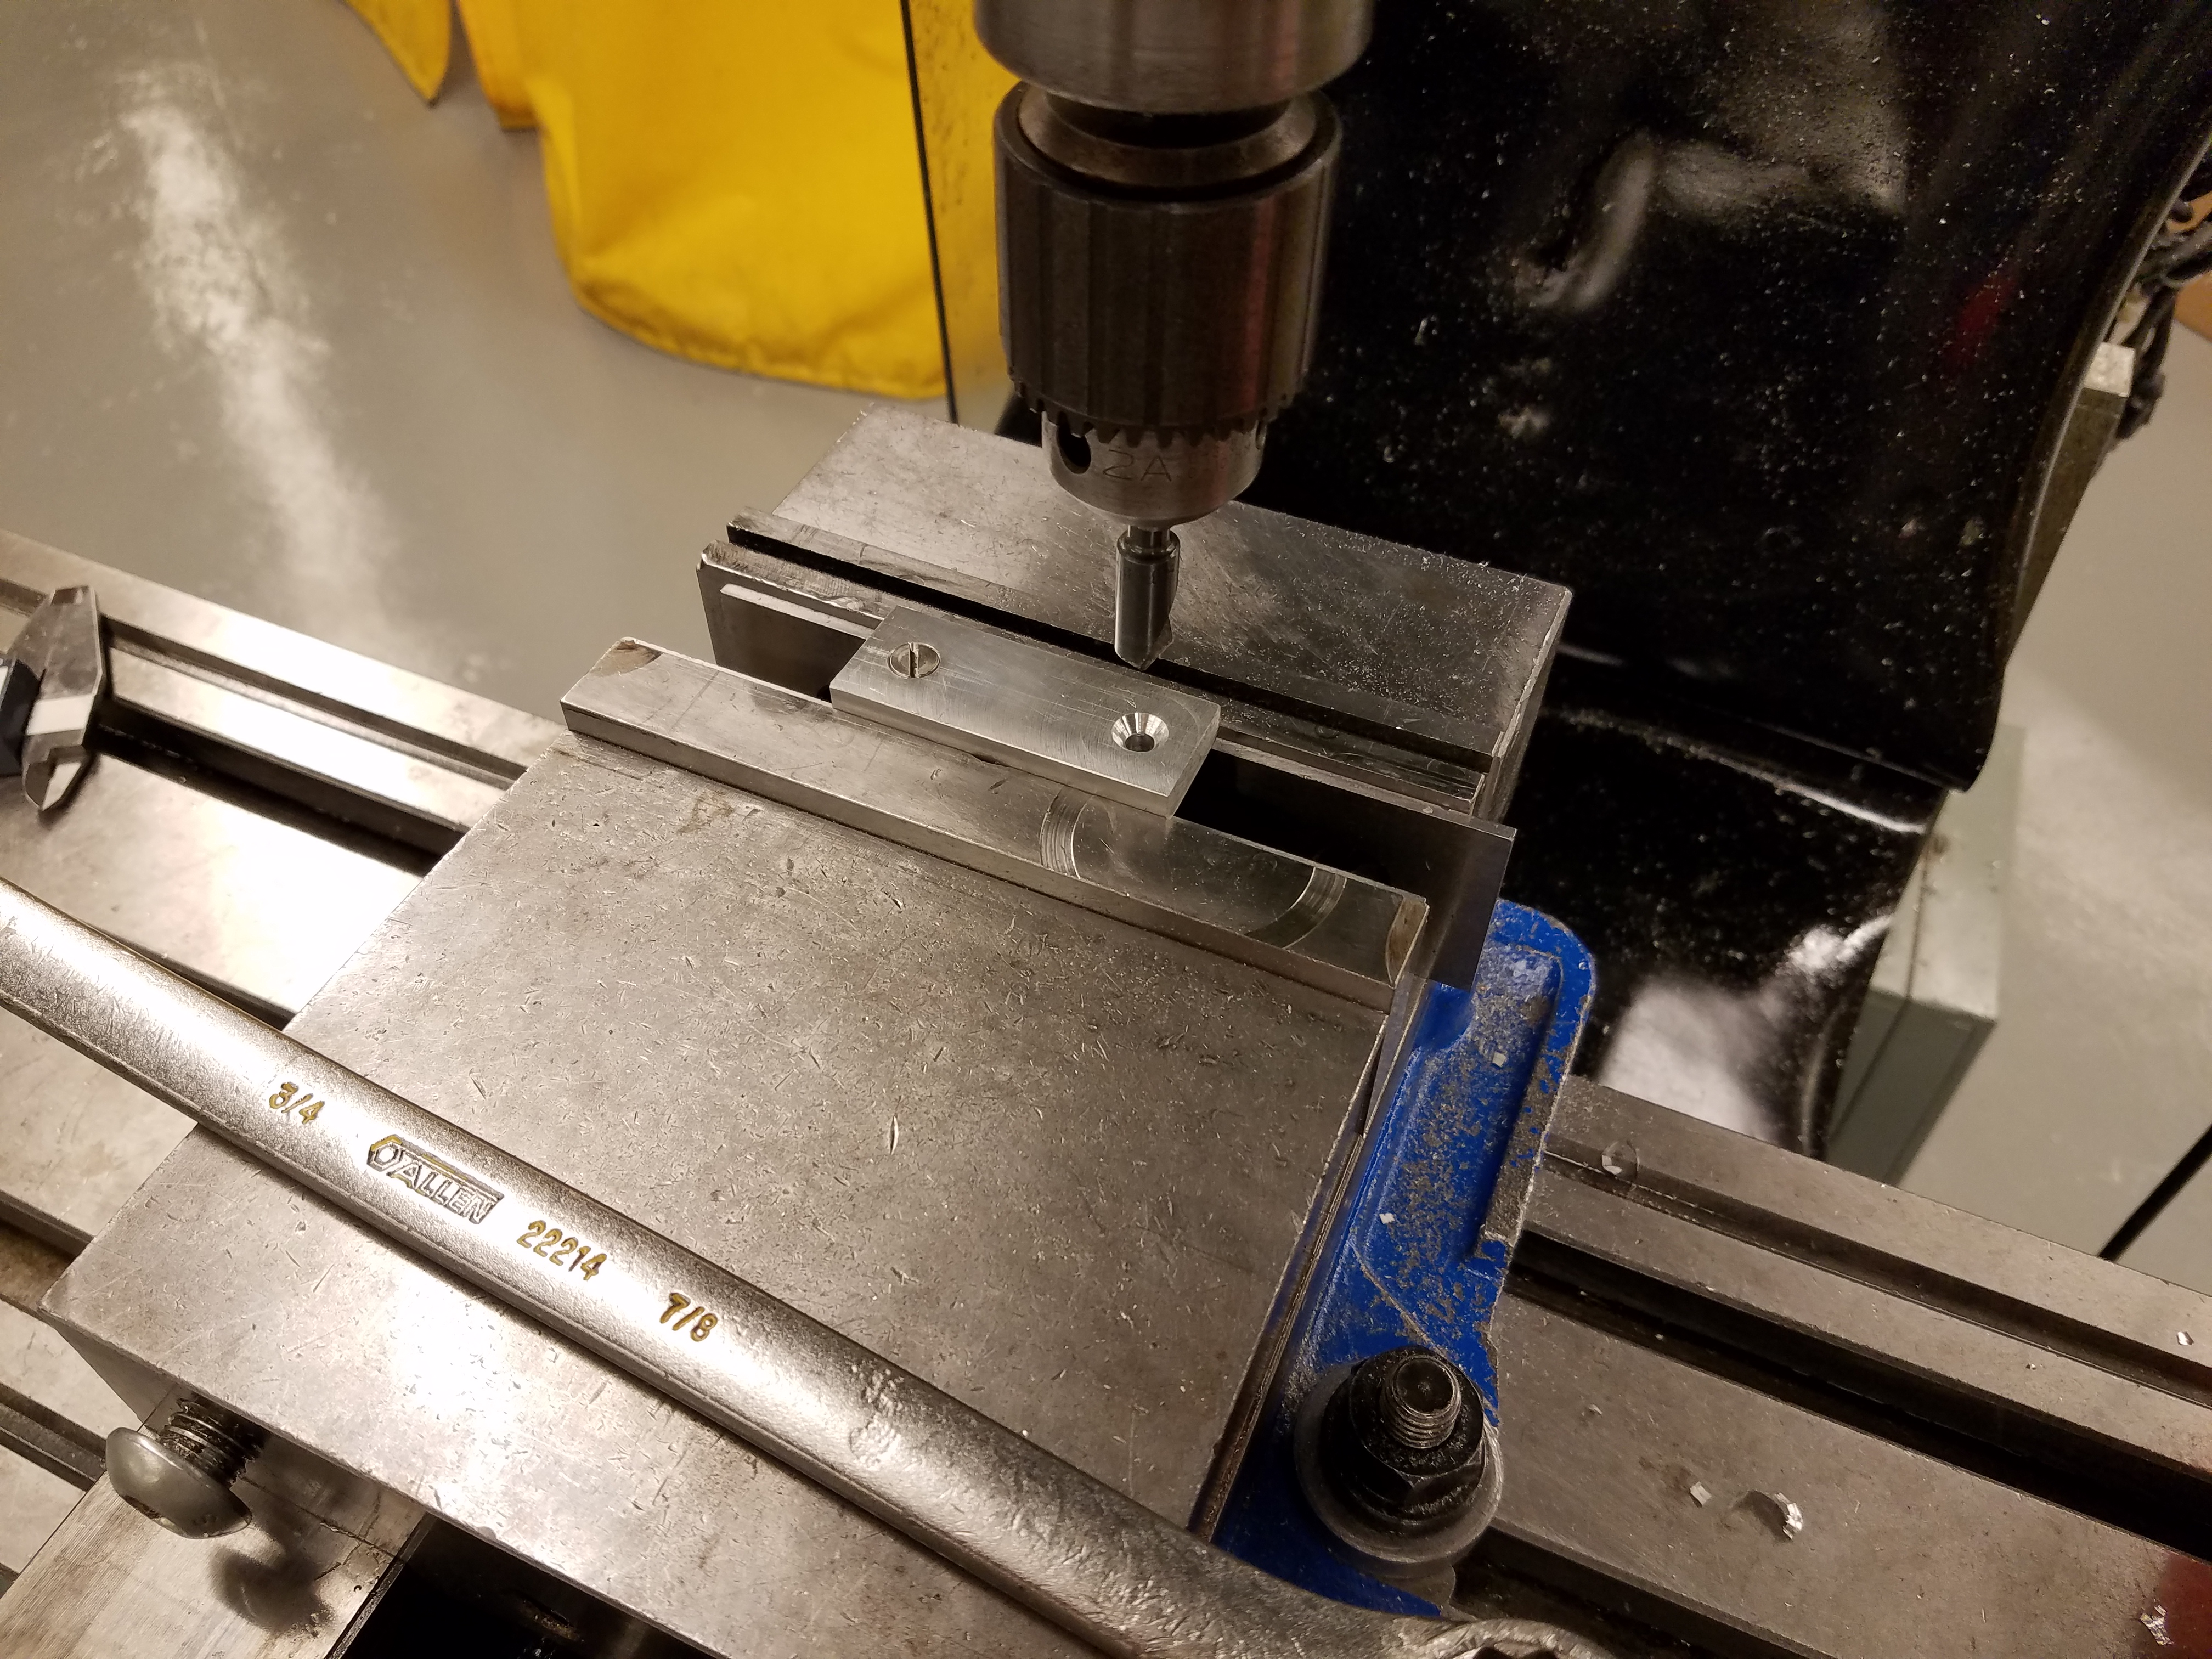
The next step was to drill two holes in the center line of the bar, so I can screw this piece onto a larger U-shaped piece, which I will use as a bracket for my pneumatic cylinder. Before drilling a hole with the milling machine, it is important to use a center drill to create a groove where you want the hole to be, which guides in the drill you actually want to use. This is how machinists are able to get really precise holes even when using large drills.
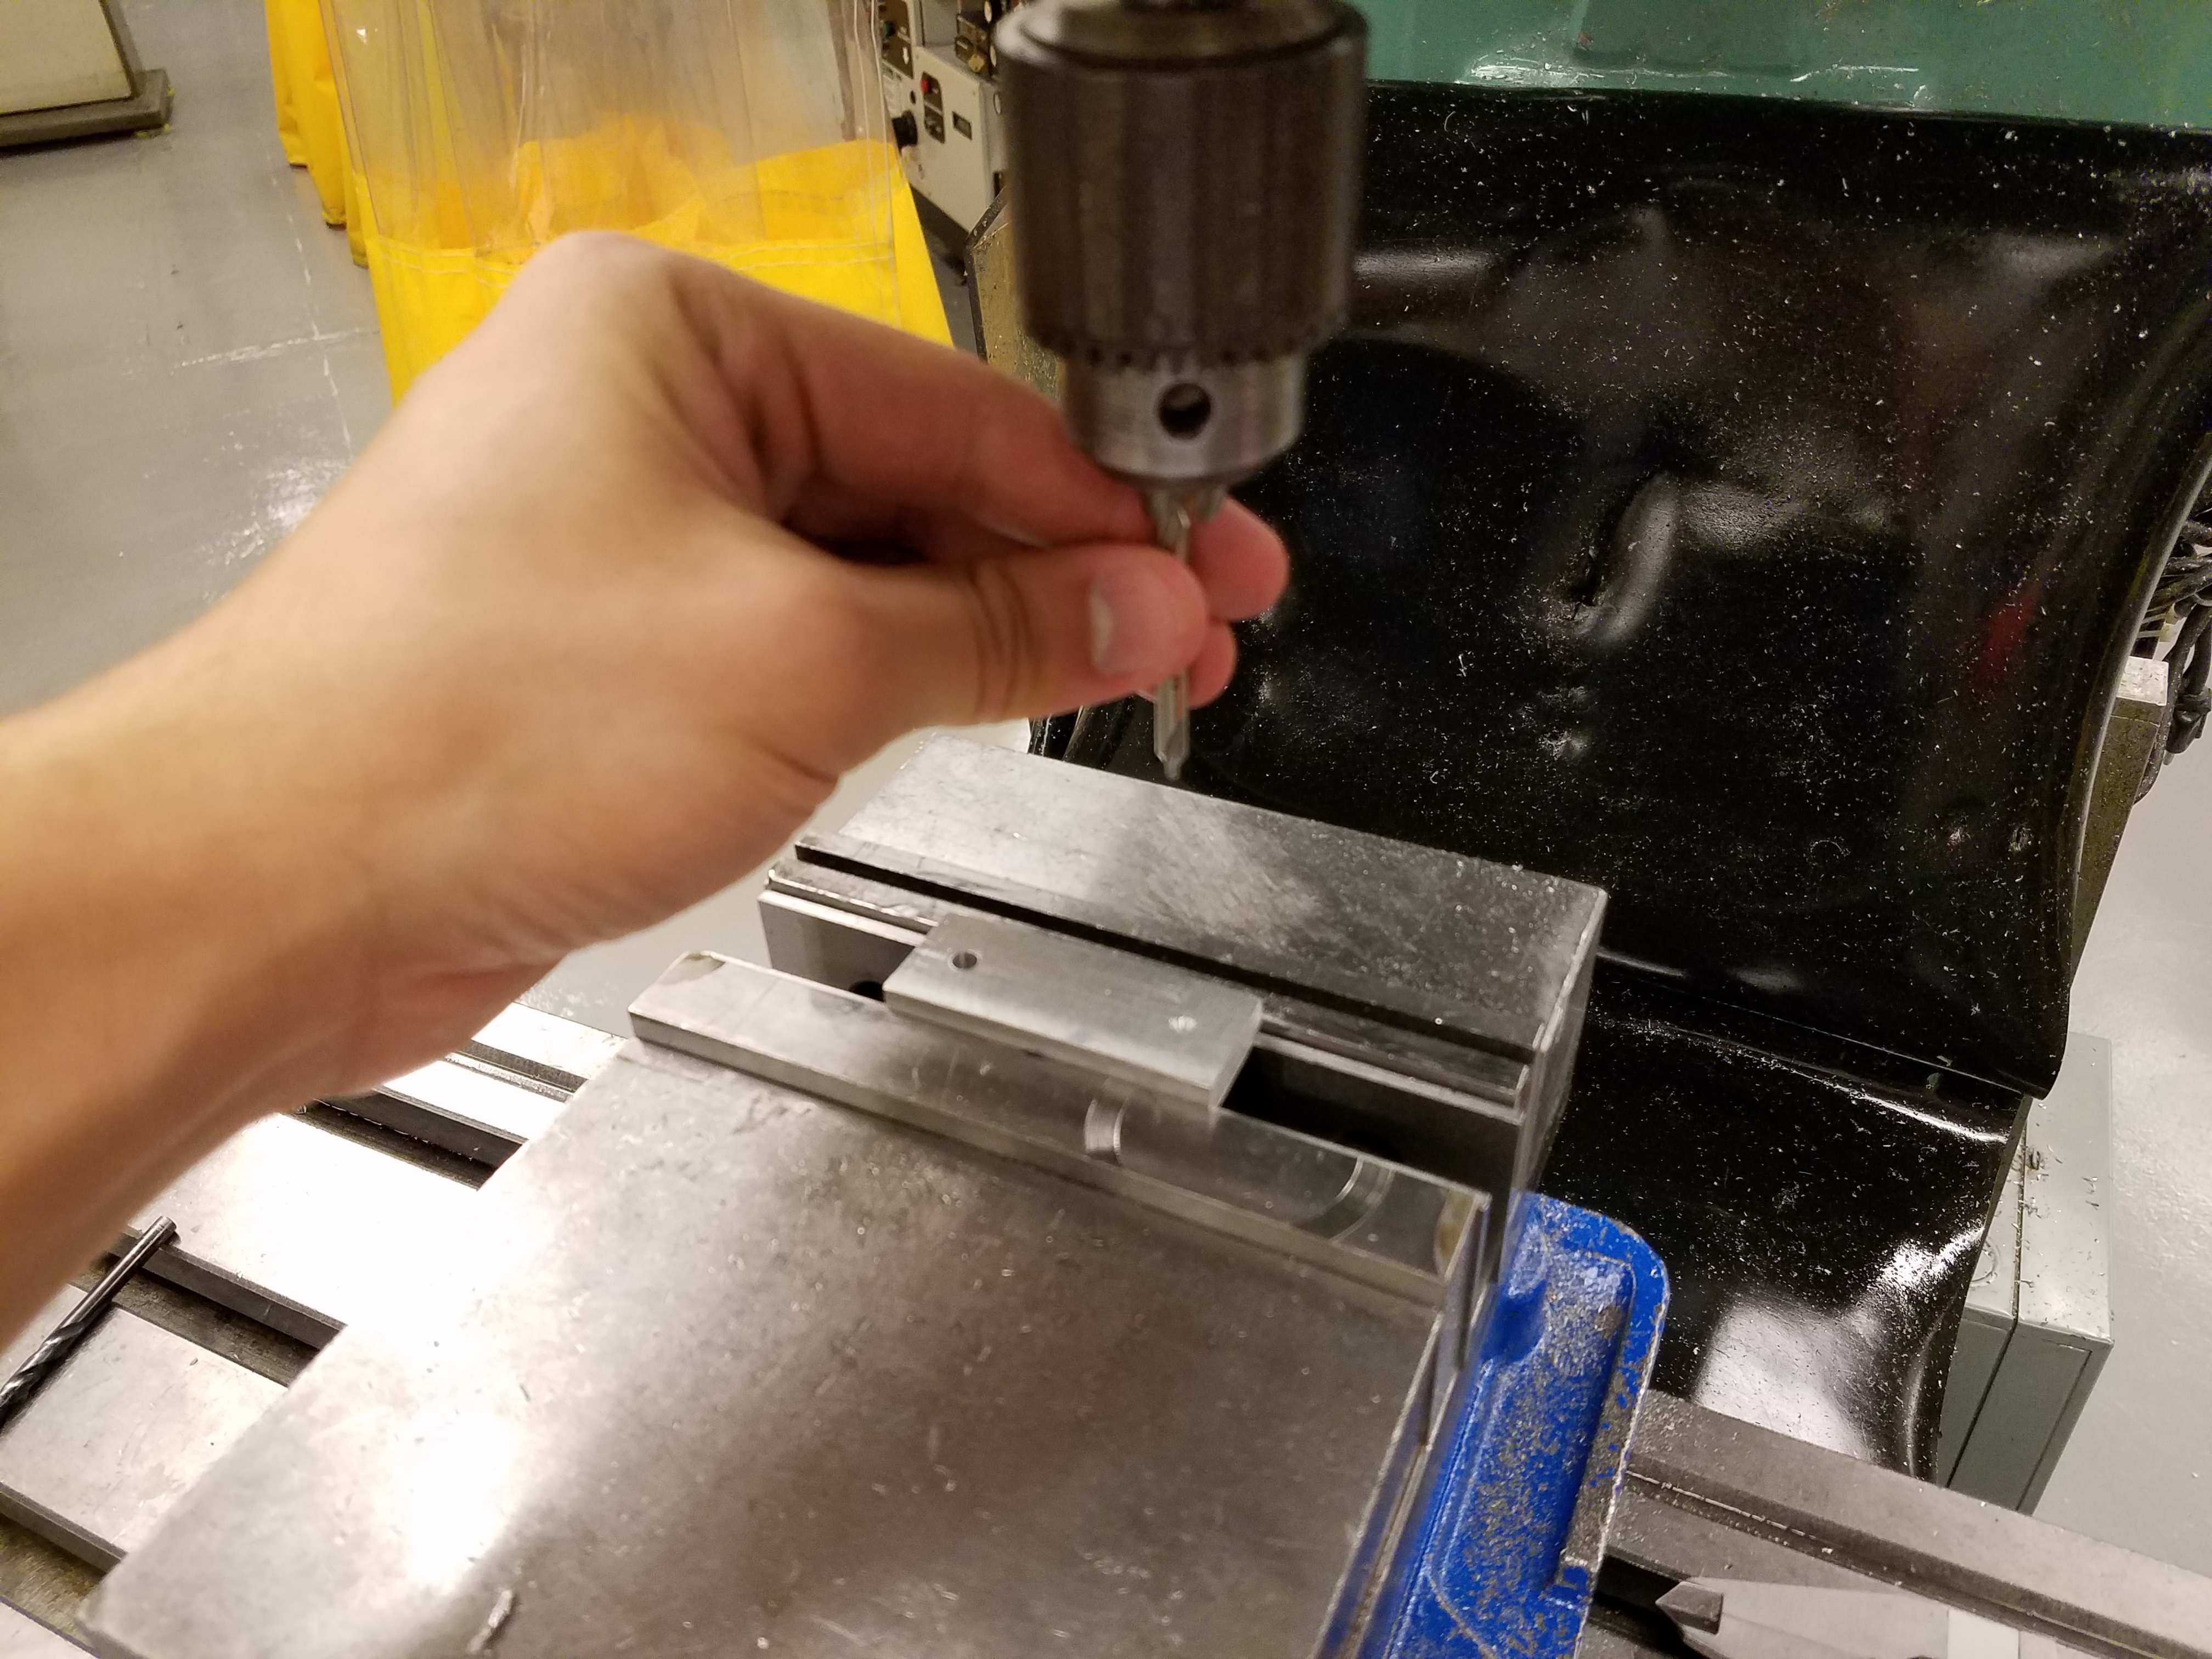
After the holes are drilled, I deburr the rim of the holes using a handheld deburring tool. Now, its time to use a countersink drill on the two holes. This creates a funnel-shaped opening that allows the fitting of a flathead screw that is completely flush with the surface of the part.
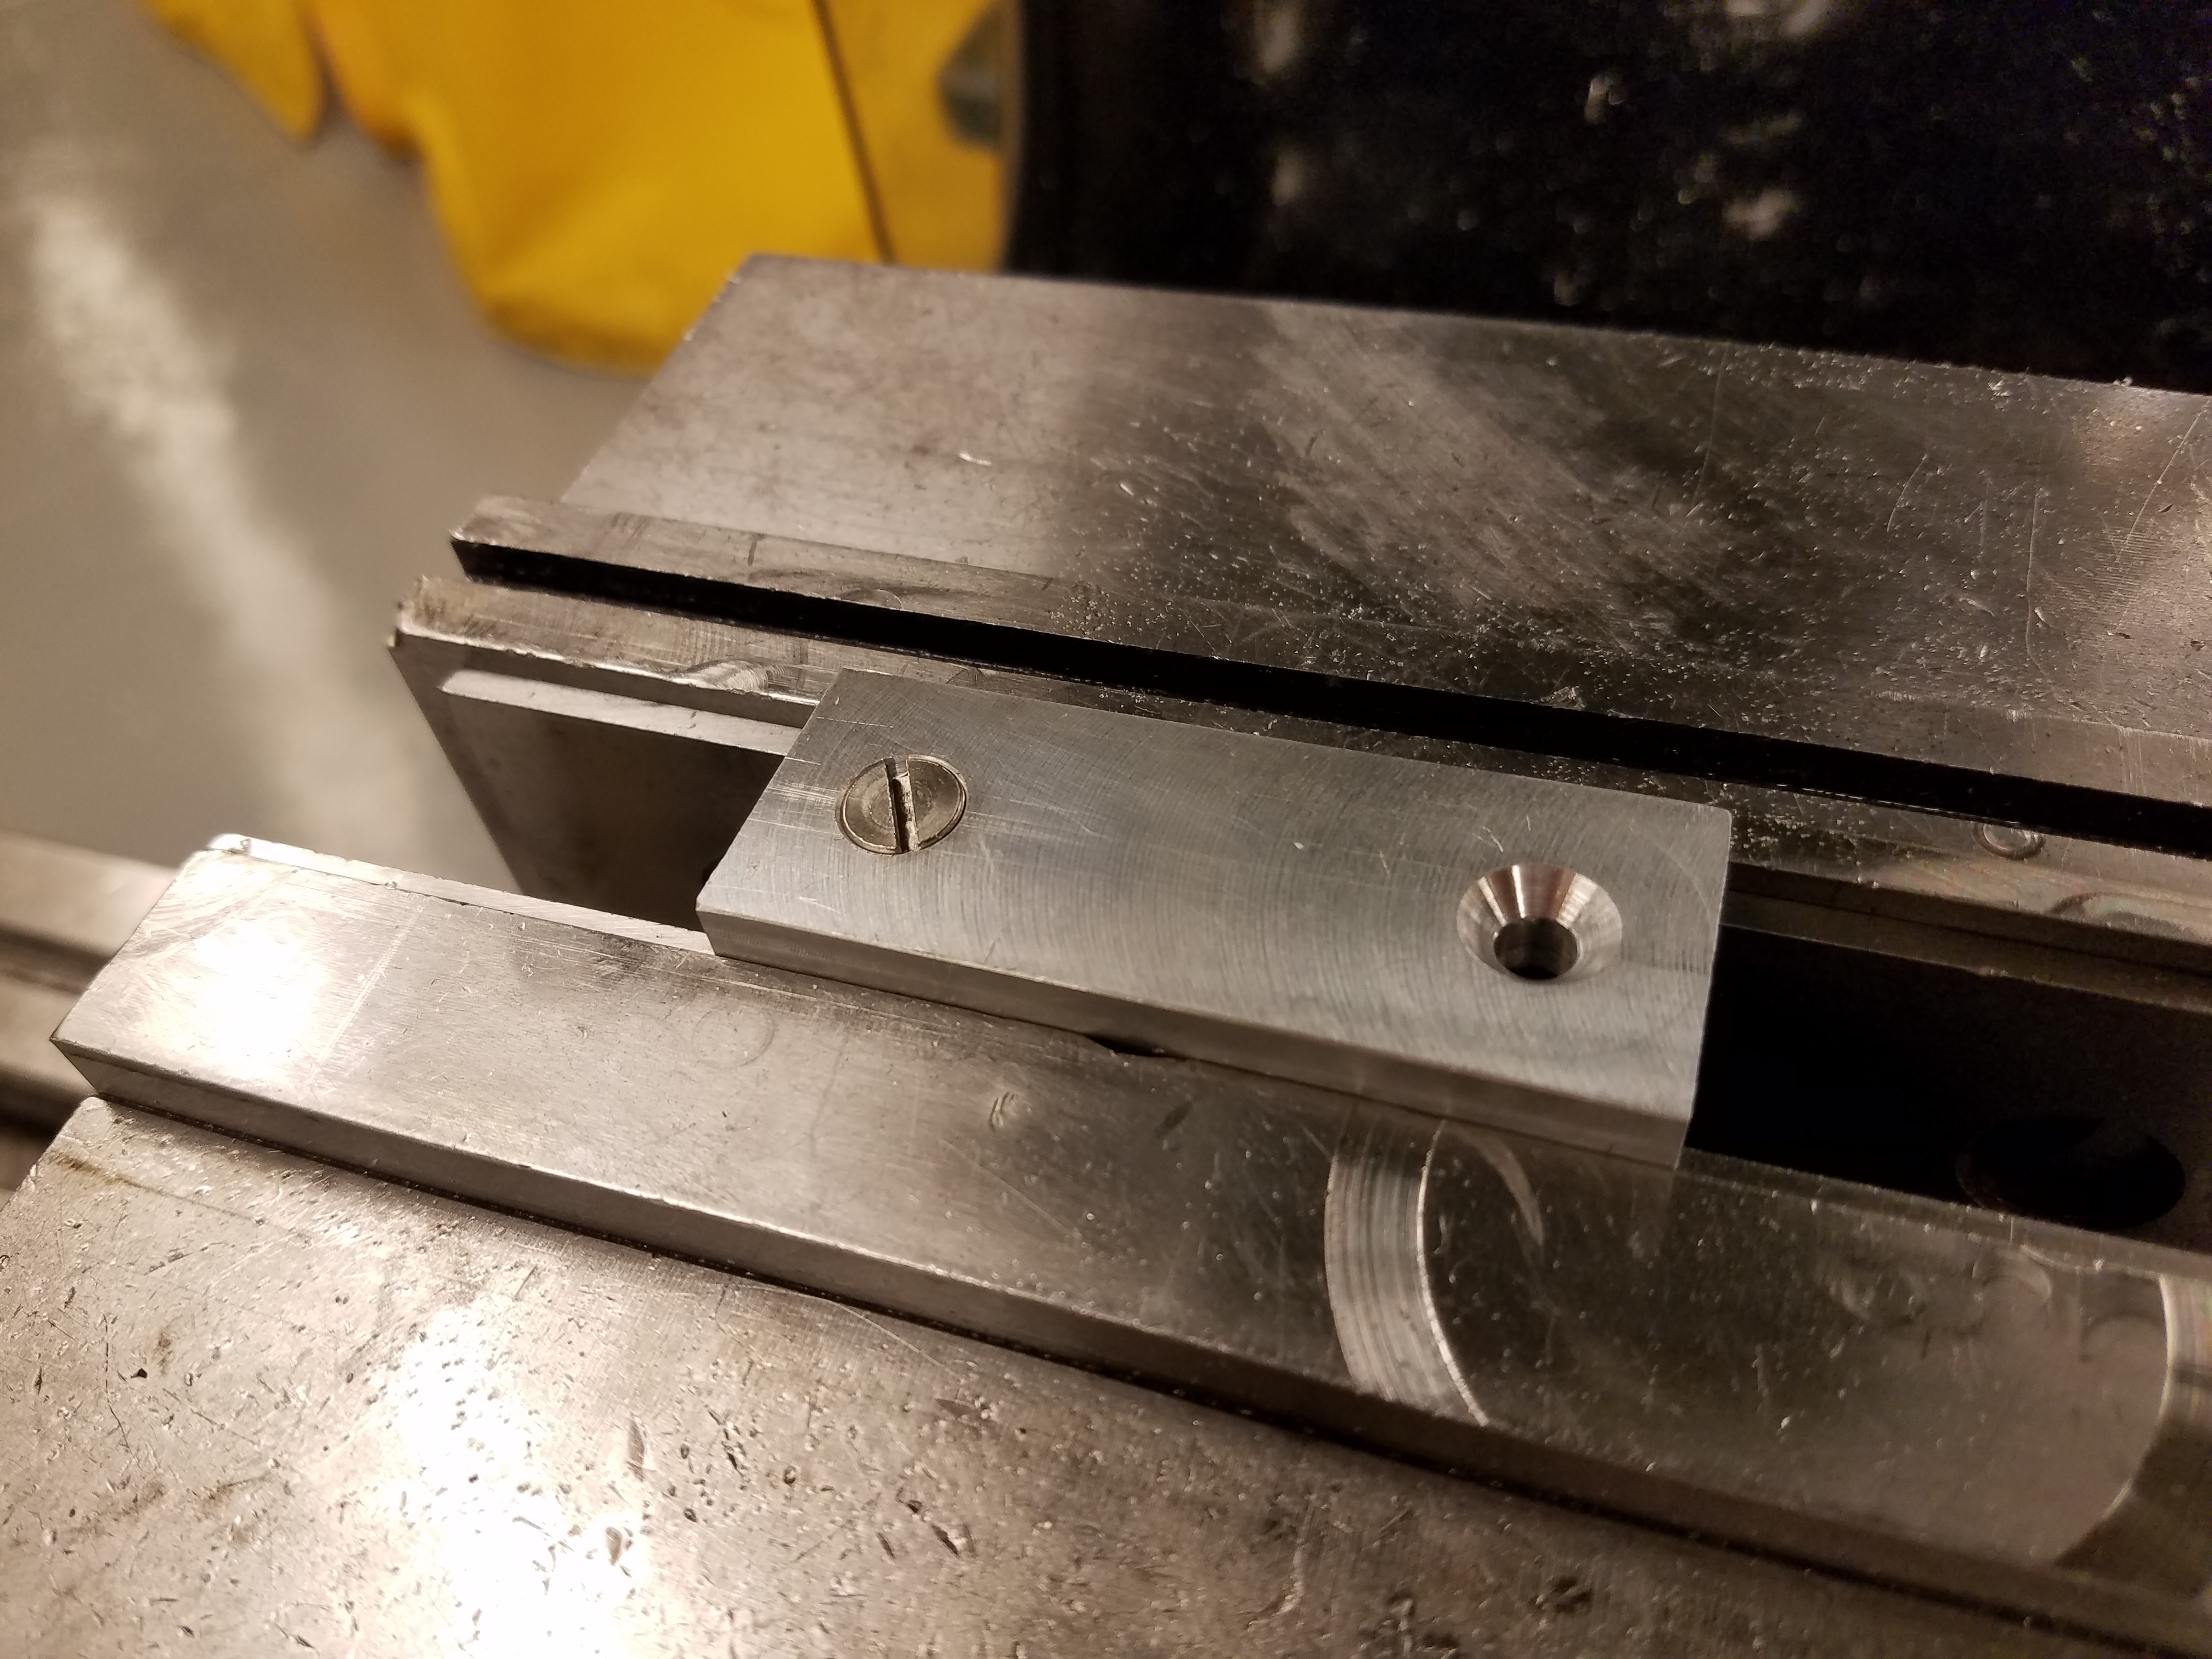
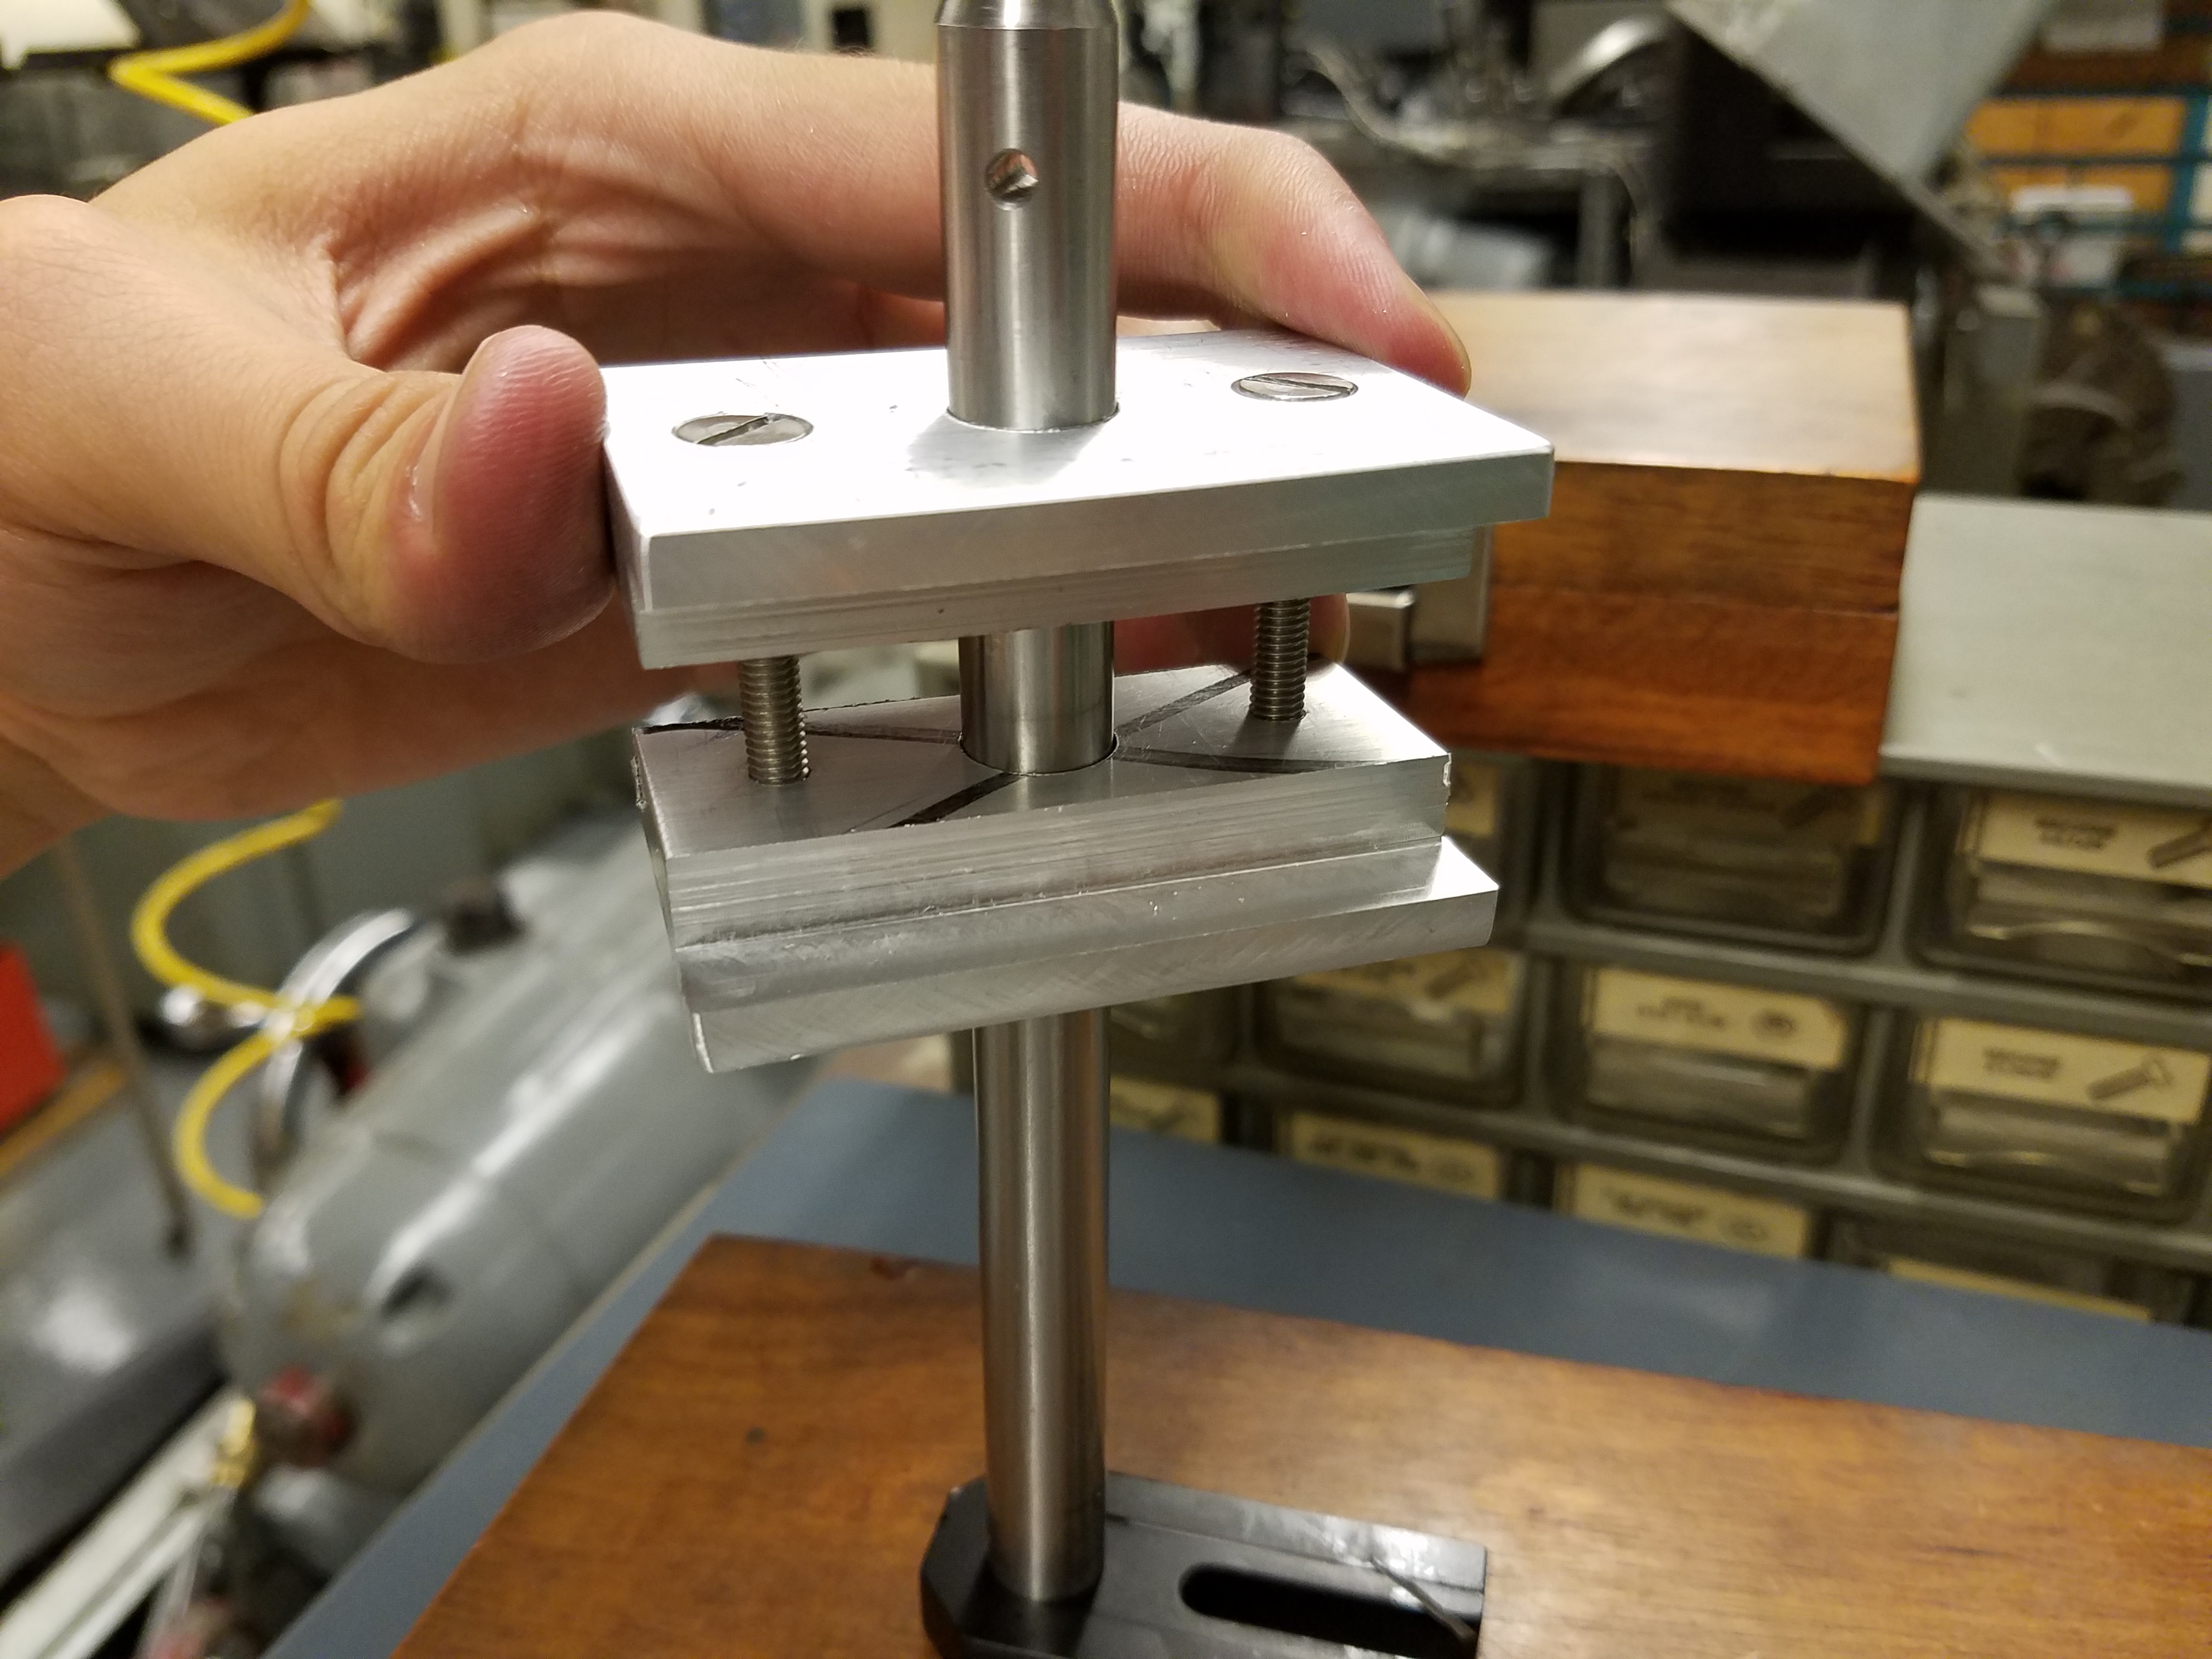
My bar is finished, and now its time to attach it to my U-shaped piece:
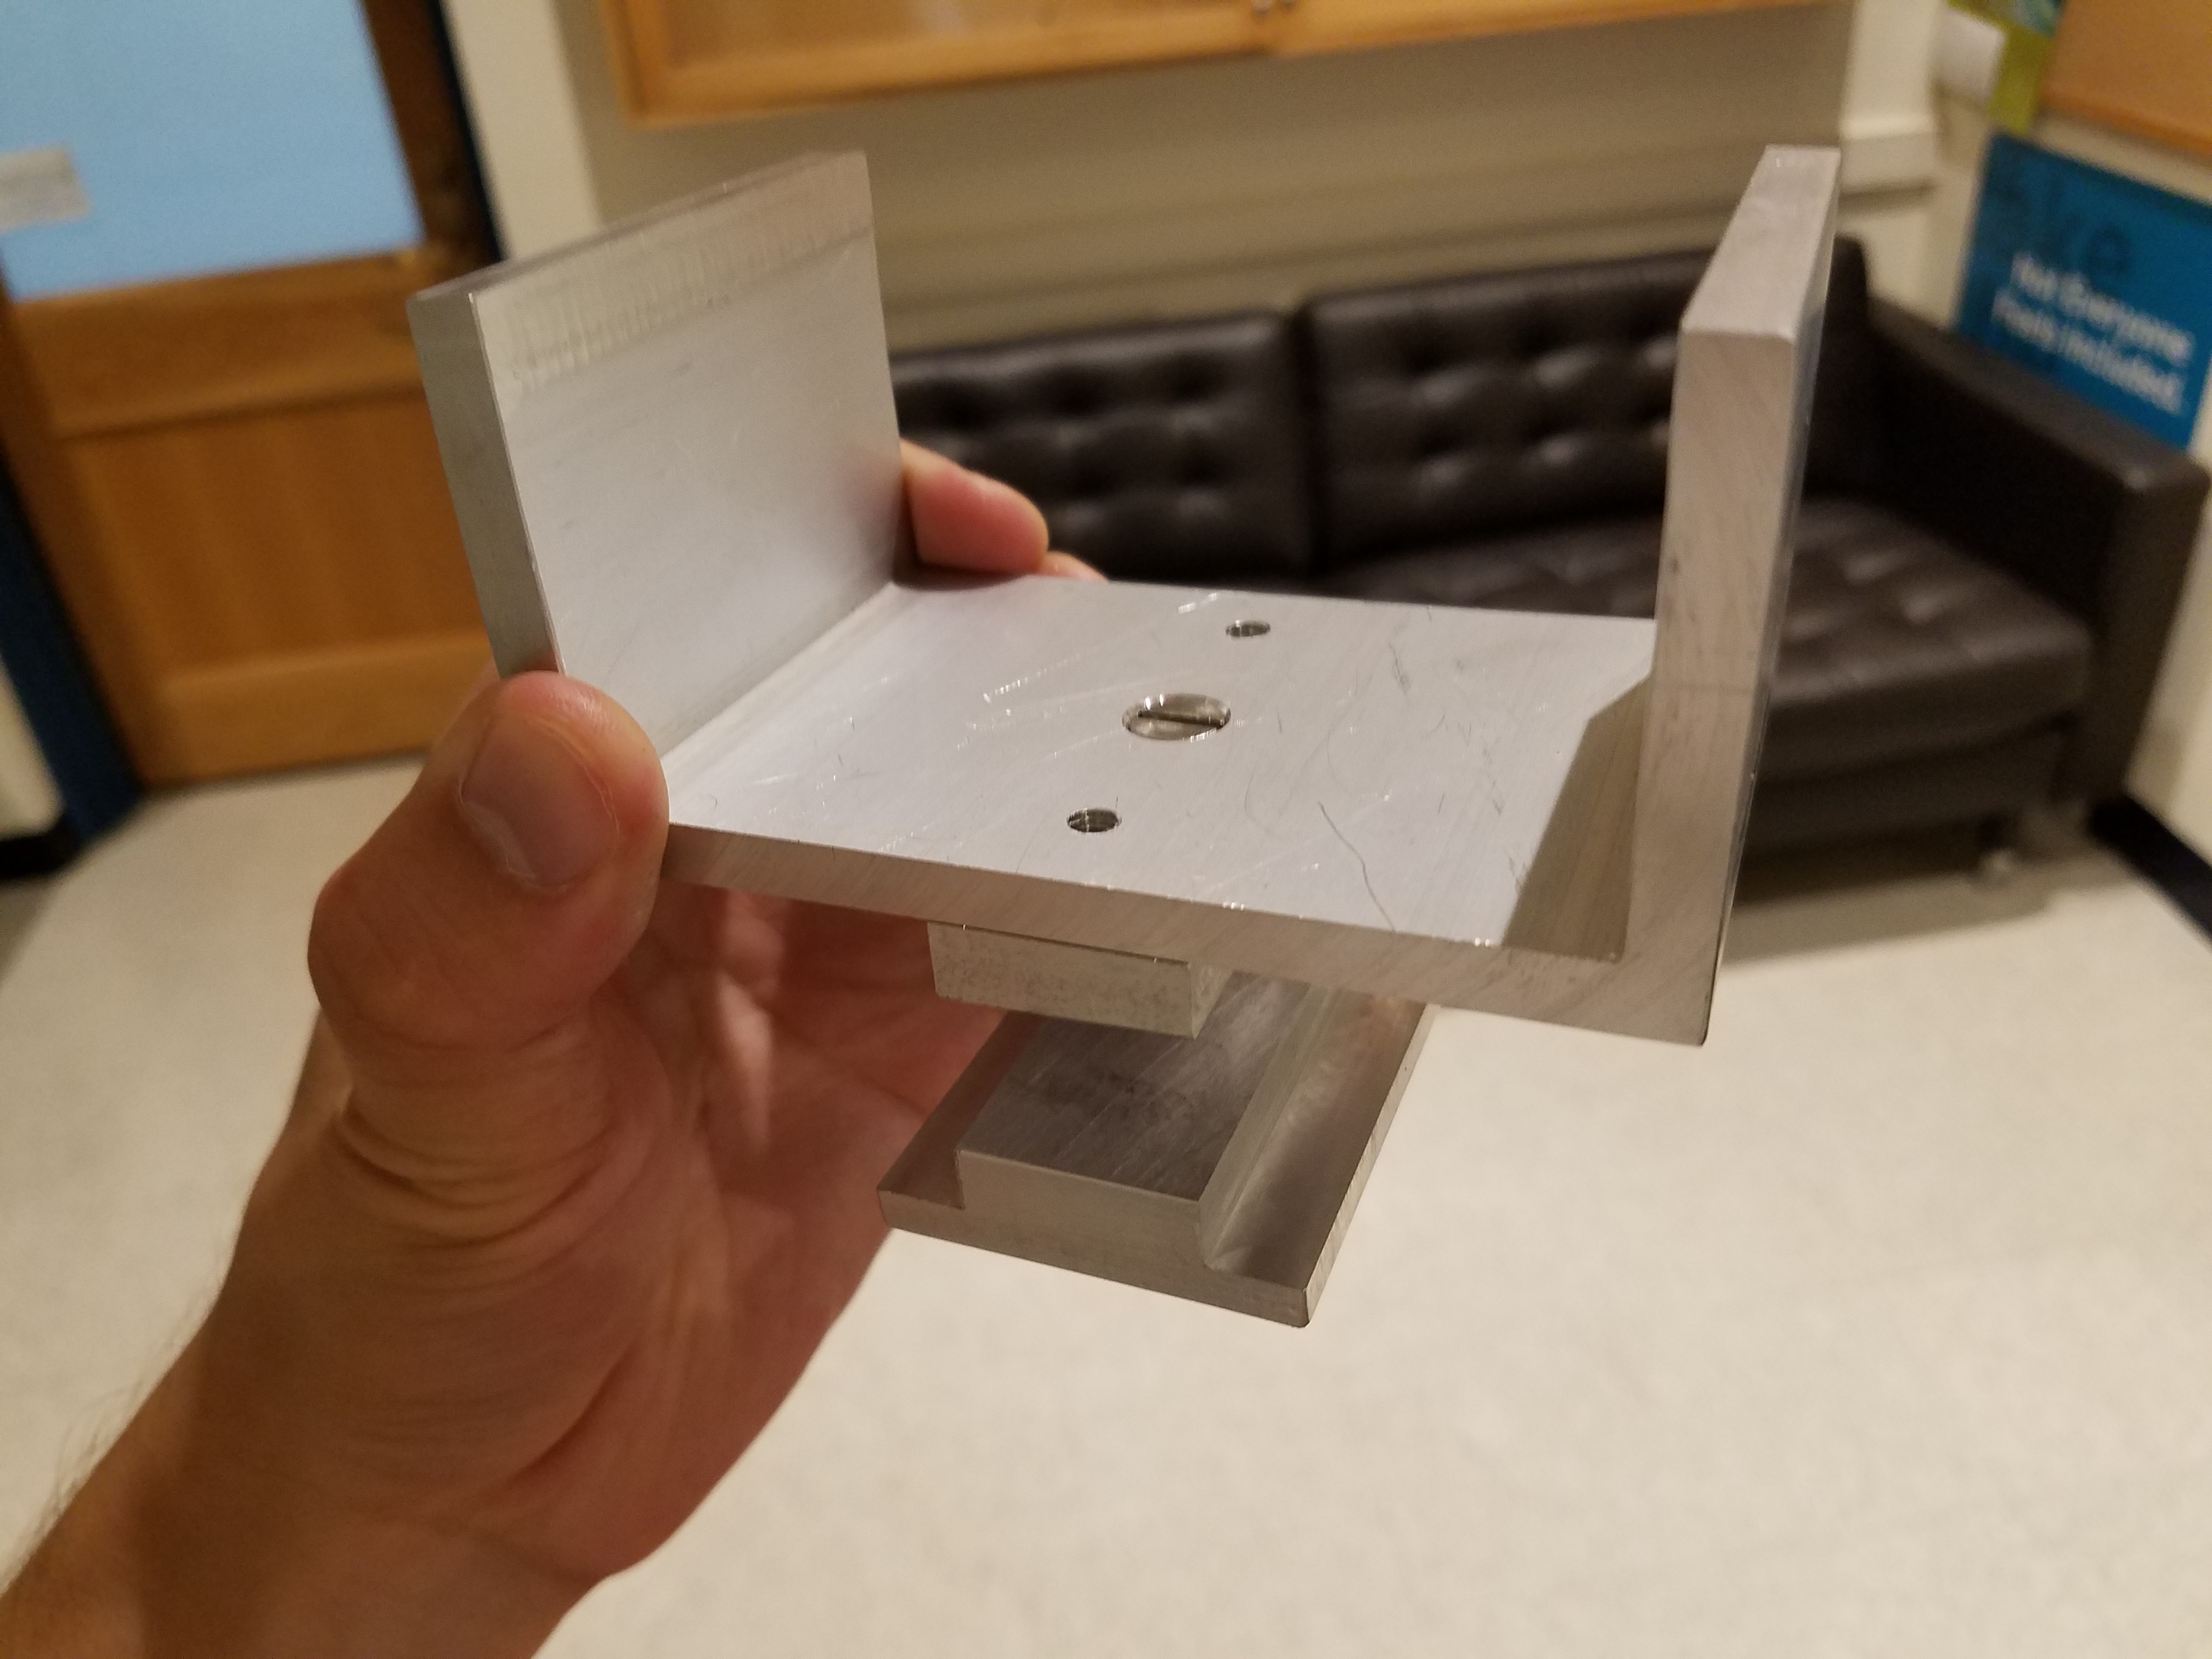
The U-shaped piece was originally a rectangular-shaped tube with the top removed using an endmill on the milling machine. To fix my bar to this piece, I use a very similar process to drill two holes, but this time I use a smaller drill diameter, so I can tap the holes and allow the flatheads to screw in without the need for nuts and washers.
I then cut three identical t-shaped bars using an endmill and deburred them with a grinder. By drilling a center hole in one of these, I was able to finish my clamp for the pneumatic cylinder by drilling a smaller and tapped hole in the U-shaped piece:
I took the two remaining t-shaped bars and used a similar process for two holes at the ends, and a large hole in the center which fits snugly around the rod of a Thor Labs clamp. This is how my robot will piviot about its shoulder.